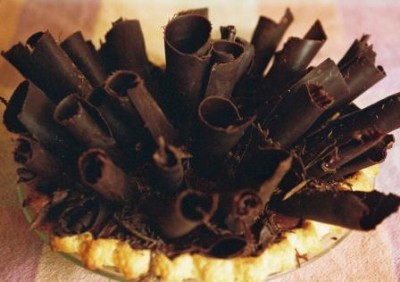
It's just so, so...chocolate! And eye-popping, and rich, and glorious.
Best of Show - “Over the Top” Chocolate Mousse Pie
Ingredients
- 9” pastry shell, baked and cooled
Filling:
- 14 oz. semisweet chocolate (cooking chocolate, not chocolate chips) chopped
- ¼ c. plus 1 t. water
- 6 egg yolks, lightly beaten
- 8 egg whites
- Pinch salt
Garnish:
- Big, really big, chocolate curls
- 6 oz. semisweet, milk or white cooking chocolate, chopped
Pie Category
All Pies | Chocolate | Best of Show | Official PiePal Recipes | Chocolate Pies | Chocolate MousseDirections
For the filling:
- In the top of a double boiler, mix the chopped chocolate and water. Over very low heat, stir until chocolate is melted and everything is smooth. Remove from heat and add the egg yolks, again stirring until smooth.
- Set the chocolate mixture aside to cool nearly completely.
- When the chocolate has cooled, beat the egg whites with a pinch of salt until stiff. Fold the whites gently into the chocolate mixture.
- Spoon mousse into the cooled pastry shell and refrigerate for at least 3 hours.
For the chocolate curls:
- Melt the 6 oz. chocolate in the top of the double boiler, again over very low heat, stirring until smooth.
- Spread the chocolate in a thin, even manner on a baking sheet. Using a pastry scraper works well to spread it. Use separate baking sheets for different colors of chocolate, or swirl them together as you spread. The chocolate layer should be fairly thin. Refrigerate until hardened.
- To make the curls, use a sharp scraper, like a pastry scraper, to shave off a strip of chocolate from the pan. The chocolate will curl as you go. Experience helps! You can make wide or narrow curls, or they may look more like bark. Your results will vary depending on the temperature of the chocolate and the angle at which you scrape.
- Lift the curls off the baking sheet(s) with something long and thin, like a chop stick. (Using your hands will melt and/or break the curls.) Freeze them on a clean baking sheet until needed.
- Just before serving, place curls on top of the pie. Let them fall in a loose pile, going this way and that, or stack them in a more angular way. The point is to be dramatic!
© Pie Pals, LLC, 2012. All rights reserved.
Baker’s Notes and Tips and Tricks
The chocolate curls may take some practice. It doesn't really matter if they're perfect, as they will be fabulous, however they look! (Much like you.) Make them ahead if want to, and store them in an airtight container in the freezer.

Follow Us


Pie Tags
- Add new tag
- Coconut Cream Pie
- Dutch
- Graham Cracker
- Hamentash
- Italian
- June
- Key Lime
- Salty Dog
- St_ Patrick's Day
- Thanksgiving
- Winning recipe
- almond
- almonds
- angel
- apple
- apricot
- banana
- berries
- best
- best of show
- blackberry
- blue ribbon
- blueberry
- bourbon
- brandy
- caramel
- cherry
- chess
- chiffon
- chocolate
- chocolate-mint
- coconut
- coffee
- cranberry
- cream
- creamy
- crumb
- crust
- custard
- date
- delicious
- easy
- family recipe
- fig
- flaky
- fresh
- frozen
- fruit tart
- ginger
- gluten-free
- grapefruit
- grasshopper
- holiday
- honey
- how-to
- juice
- lattice
- lemon
- lime
- low sugar
- macaroon
- maple
- meringue
- mint
- mocha
- nut
- nuts
- orange
- original
- party
- pastry
- pastry recipe
- peach
- pear
- pecan
- perfect
- pie
- pie crust
- piepals
- pineapple
- pink
- pistachio
- pudding
- puff
- pumpkin
- raspberry
- raspberry pie
- recipe
- refrigerator
- rhubarb
- streusel
- sugar-free
- tart
- tart crust
- triple
- truffle
- vanilla
- vodka
- walnuts
Pie Categories
Recent Pie Comments
Site by 
Rebecca Jo Dakota
05. February, 2013 | #
Hi Anne,
I'm going to add an olive oil pie crust recipe to the "crusts" category of Pie Pals. Let me say, however, that I've never made...
Anne
23. January, 2013 | #
I would beinterested to learn how to make crust with organic flour, oil and other organic alternatives. Was butter the original...
Felicia Montoya
19. April, 2012 | #
Make sure to use sweetened condensed milk and NOT evaporated milk.